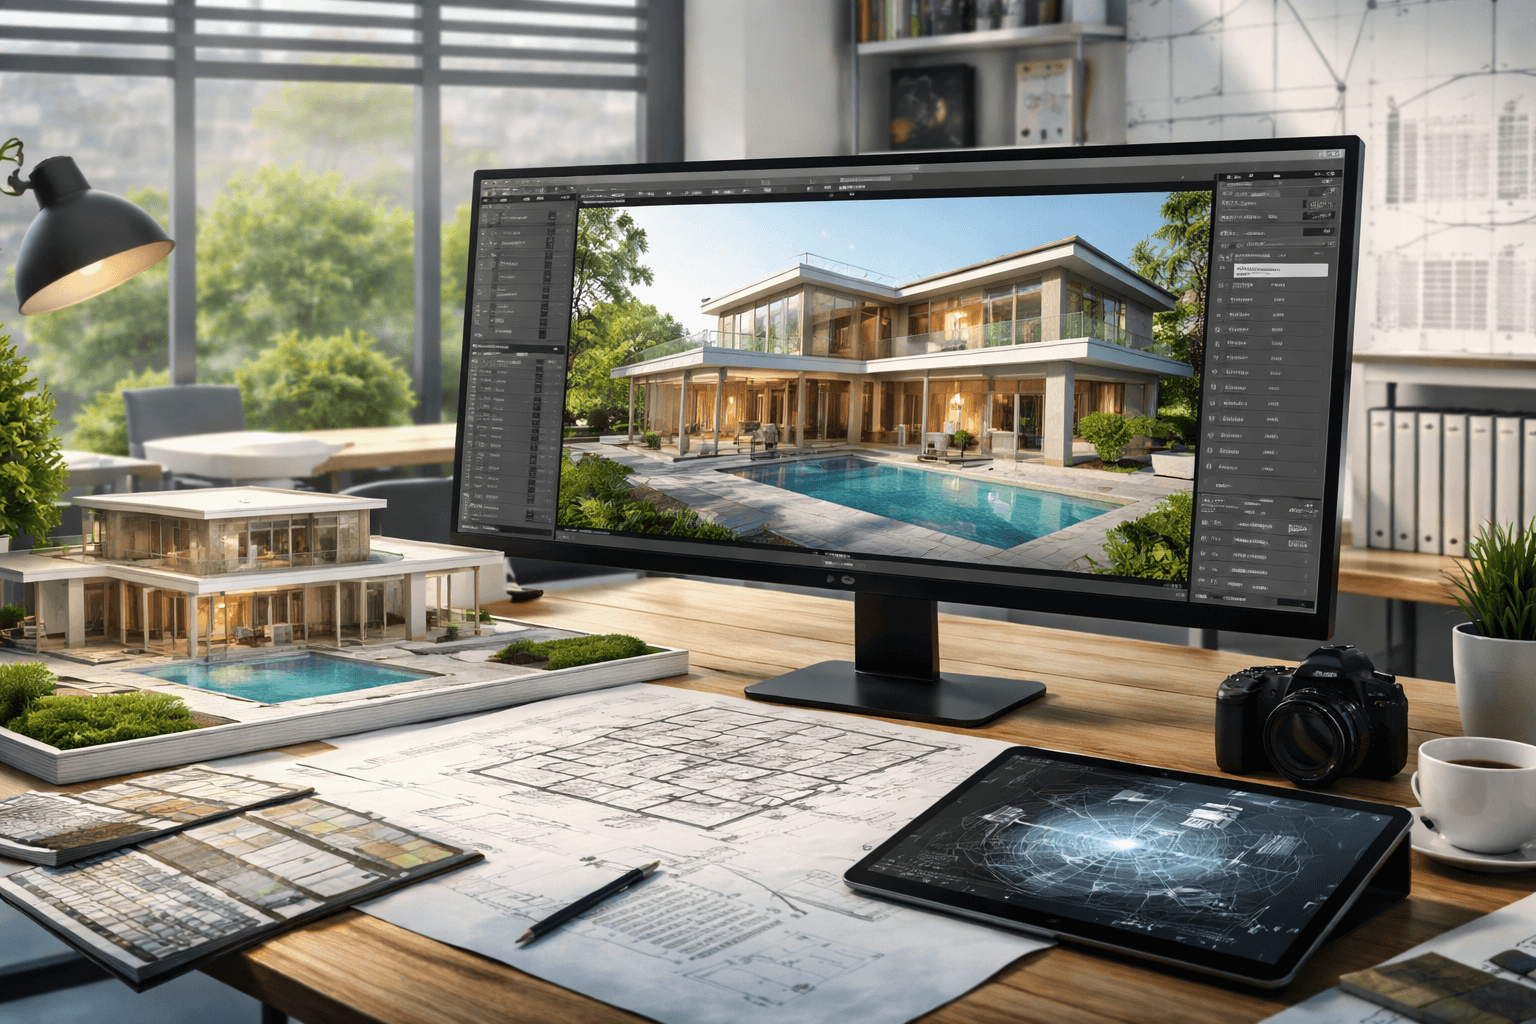
The 3D rendering process can look simple from the outside. A client sends drawings, a studio sends back polished images, and the project moves on. But in real work, that is not how it happens. Good renderings come from a structured process where each step affects the next one. If the brief is weak, the result gets weaker. If the model is inaccurate, no amount of post-production will fully fix it. If the lighting is wrong, even a technically correct scene can still feel flat.
That is why understanding the architectural rendering workflow matters. It helps developers, architects, marketers, and real estate teams know what to expect, where delays usually happen, and what actually drives quality. It also makes it easier to choose the right partner. A reliable studio does not just make images look attractive. It manages the full 3D rendering pipeline in a way that reduces revisions, protects deadlines, and keeps the visuals aligned with the project’s real goals.
What Is the 3D Rendering Process in Simple Terms
At a basic level, the rendering process is the path from project information to a final visual. That sounds straightforward, but people often mix up rendering, modeling, and visualization as if they mean the same thing. They do not.
Modeling is the stage where the 3D object or space is built. This is where dimensions, forms, architectural elements, furniture, façade details, and layout logic take shape in a digital environment. If the model is inaccurate, everything that follows will be compromised. A clean model is not just a technical detail. It is the base of the whole 3D rendering pipeline.
Rendering is the stage where that model is processed into an actual image. This is where the software calculates light, shadow, reflections, materials, depth, and atmosphere. In simple terms, rendering turns a 3D scene into something a client can look at and understand. It is the moment when geometry becomes visual communication.
Visualization is the wider concept. It includes the full visualization workflow, not just the render itself. That means the brief, references, modeling, material setup, lighting, cameras, render output, and post-production. In real estate, architecture, and development projects, clients usually care about visualization as a business tool. They want to see how a building, room, or product will look before it exists. So while rendering is one stage, visualization is the whole process that leads to a usable final result.
This distinction matters because it shapes expectations. A client may think they are paying for “a few renderings”, but what they actually need is a controlled architectural rendering workflow. That workflow is what makes the visuals accurate, persuasive, and usable for presentations, approvals, pre-sales, investor communication, or marketing campaigns in the U.S. market. When a studio treats rendering as just pressing a button, the result usually shows it. When the work follows a real production process, the outcome is more predictable and the project runs with far less friction.
Another point worth understanding is where rendering sits inside the pipeline. It does not come first, and it is not the only stage that matters. Rendering sits after the scene has already been prepared. By the time a team starts final rendering, the key decisions should already be in place: model structure, materials, camera logic, mood, and overall direction. That is why strong studios spend a lot of time upstream. They know that most visual problems are not really “render problems”. They are process problems.
Full Architectural Rendering Workflow: Step-by-Step
A professional architectural rendering workflow follows a clear order. The exact tools may vary from one studio to another, but the logic stays mostly the same. Each stage solves a specific problem, and each one affects timing, realism, and revision control. Here is how the rendering process usually works in practice.
Step 1 – Project Brief and References
Every strong rendering project starts with clarity. Before any modeling or rendering begins, the studio needs to understand what is being shown, who the visuals are for, and what the images need to achieve. This is where the project brief comes in.
A good brief usually includes floor plans, elevations, sketches, CAD files, mood boards, material notes, branding guidance, and examples of preferred visual style. It should also define the purpose of the images. A rendering for investor presentations is not approached the same way as a rendering for luxury residential marketing or planning approvals. The audience changes the visual priorities.
This stage solves one of the biggest problems in the architectural rendering workflow: vague input. When clients send limited information or unclear direction, the result is usually more revisions, more back-and-forth, and more lost time. In real production, many delays do not happen because rendering is slow. They happen because the brief was incomplete.
Studios with real experience know how to guide clients through this step. That matters. Not every client knows what files to prepare or how much visual direction is enough. A professional team helps organize that information early, which makes the rest of the rendering process more efficient. This is one reason why working with an experienced studio like Fortes Vision can save time long before the first draft is delivered.
Step 2 – 3D Modeling
Once the project information is clear, the next step in the 3D rendering pipeline is modeling. This is where the digital structure of the building, room, landscape, or product is created. The goal is not decoration yet. The goal is accuracy.
At this stage, the team builds walls, floors, ceilings, windows, façade systems, furniture, fixtures, surroundings, and other key elements based on the source files. Scale and proportion matter a lot here. If a window is too high, a corridor is too narrow, or a furniture layout feels off, the final image will not feel credible no matter how advanced the renderer is.
This is also where many clients misread the process. They expect the project to look polished right away, but the early model often looks plain and technical. That is normal. The purpose of modeling is to establish structure, not final beauty. In a professional visualization workflow, “clean and correct” comes before “beautiful and photorealistic”.
Good modeling reduces future problems. It supports cleaner lighting, more realistic materials, better camera framing, and fewer correction rounds. Poor modeling does the opposite. It creates errors that keep resurfacing later, often at the most expensive stage of production. That is why technical discipline matters so much in the rendering process.
Step 3 – Materials and Textures
After the model is approved or at least directionally stable, the scene moves into materials and textures. This stage is where surfaces start to behave like real surfaces. Concrete should not reflect like polished plastic. Glass should not look dead. Wood grain should feel believable. Fabric should respond to light in a way that fits its texture and density.
This part of the visualization workflow has a huge effect on realism. Many weak renderings fail here. The structure may be correct, but the materials feel generic, flat, or physically wrong. That makes the image look artificial, even when the client cannot explain why.
In professional work, materials are not chosen only for color. They are built around how surfaces react to light. Reflection, roughness, bump, gloss, translucency, and scale all matter. Physically based materials are often used because they help produce results that feel more grounded and consistent across different lighting conditions.
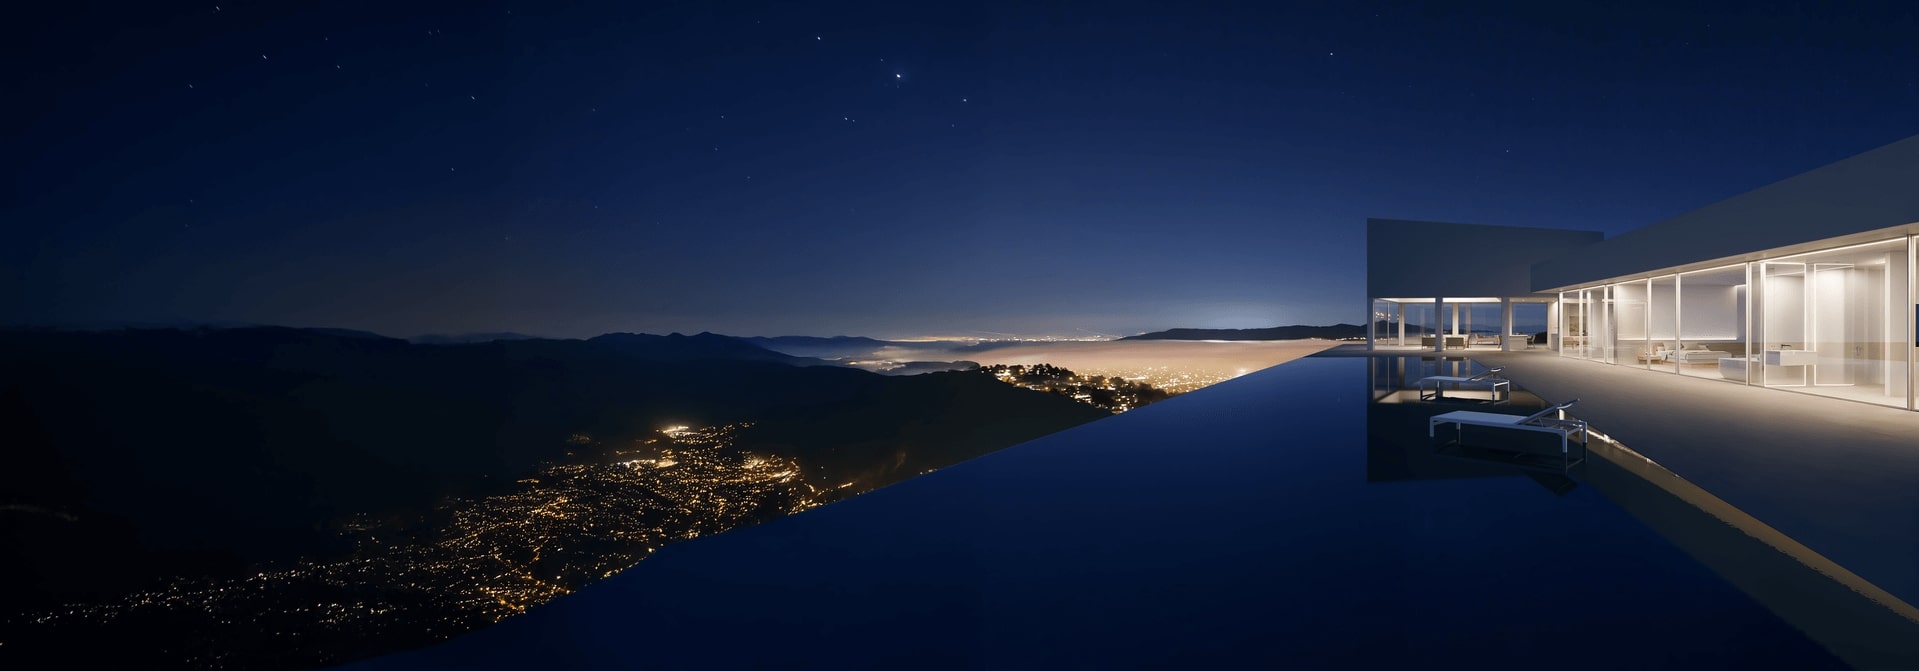
This is also where project intent matters. A luxury residential interior in Miami may need warmer tones, rich finishes, and tactile realism. A commercial development rendering may need cleaner material language and a more restrained look. The rendering process is never only technical. It is also strategic. The materials need to support the market position of the project.
Step 4 – Lighting Setup
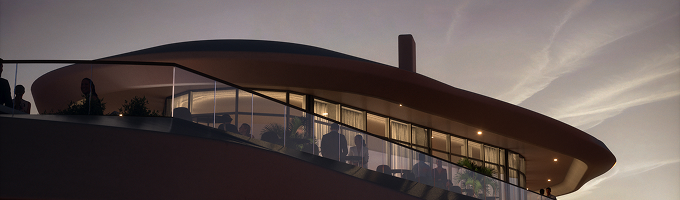
Lighting is one of the most important parts of the architectural rendering workflow. It shapes mood, realism, depth, and focus. It can make the same model feel premium, ordinary, inviting, dramatic, or cold.
In practice, lighting setup often includes daylight logic, sun position, artificial interior lighting, environmental light sources, and sometimes HDRI-based setups for natural atmosphere. The goal is not just to make the scene visible. The goal is to make it believable and useful.
A common problem in the rendering process is lighting that is technically bright enough but emotionally wrong. The image may show everything, but still feel flat or lifeless. Another issue is over-stylized lighting that looks cinematic but does not match the project’s real architectural intent. Strong studios know how to balance realism with presentation value.
Lighting decisions also depend on use case. Marketing visuals may call for a more polished and carefully staged mood. Planning visuals may need a more neutral and accurate approach. In both cases, poor lighting weakens trust. That matters because clients and buyers often judge the quality of the project through the quality of the visuals.
Step 5 – Camera and Composition
Once the scene is built and lit, the next step is deciding how it should be seen. This is where camera setup and composition come in. And this step is often underestimated.
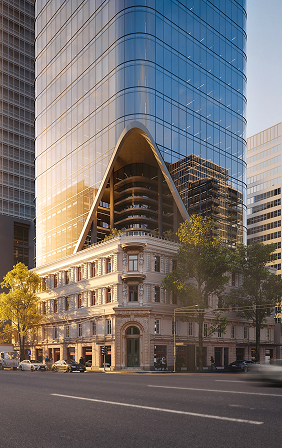
A technically good scene can still produce weak results if the angle is wrong. If the camera sits too high, the space can feel unnatural. If the focal length is poor, the proportions may distort. If the composition lacks hierarchy, the viewer’s eye has nowhere to go. That is a problem, especially when the rendering is meant to support marketing, sales, or stakeholder communication.
In a strong architectural rendering workflow, camera choices are not random. They are tied to the goal of the image. A developer may want to highlight façade presence, outdoor amenities, or arrival experience. An interior rendering may need to show spatial flow, natural light, and material quality. A real estate marketing set may need a mix of hero angles and supporting views that work across brochures, websites, and presentation decks.
This is one more place where experienced studios add real value. They do not only ask, “What should we show?” They ask, “What should the viewer understand first?” That shift improves the final image and makes the visuals more useful in business terms.
Step 6 – Rendering (Final Image Creation)
This is the stage most people think of first when they hear the phrase rendering process. It is the point where the prepared 3D scene is processed into final images. The software calculates light transport, surface interaction, shadows, reflections, global illumination, and all the data needed to generate the output.
But by this point, most of the important decisions have already been made. Final rendering is not where the workflow becomes smart. It is where the earlier smart decisions are converted into deliverables.
The time this stage takes depends on several factors: image resolution, scene complexity, lighting setup, number of assets, material detail, and target realism. A simple scene may render relatively quickly. A high-end photorealistic exterior or interior can take much longer, especially if multiple camera angles are involved. That is why clients should not think of rendering time in isolation. It is part of the full 3D rendering pipeline, not a standalone task.
Professional teams manage this stage carefully because it affects deadlines, hardware load, and revision planning. They also know when a scene is ready for final output and when pushing it forward too early will only create wasted time later.
Step 7 – Post-Production
The last stage in the visualization workflow is post-production. This is where the rendered image is refined for final delivery. It may include color correction, contrast tuning, sky replacement, atmospheric effects, selective cleanup, people or vegetation integration, and other finishing adjustments.
This stage is important because a raw render is rarely the true final image. Even good renders usually need controlled refinement to reach presentation level. That does not mean post-production should “save” a weak image. It should enhance a strong one.
A common mistake is assuming that if the render engine is advanced enough, post-production is optional. In real production, that is rarely true. Final visuals need polish, balance, and clarity. They need to read well on websites, in print materials, in pitch decks, and in digital marketing assets. Post-production helps bridge the gap between technically correct output and communication-ready imagery.
Done well, this stage improves the image without making it feel fake. Done poorly, it can make the visual look overprocessed and untrustworthy. That balance is part of what separates experienced studios from teams that only know the software side. And that is often why companies choose a partner like Fortes Vision when they need visuals that are not just attractive, but commercially useful.
3D Rendering Pipeline Explained
The easiest way to understand the 3d rendering pipeline is to see it as a sequence with three parts: input, processing, and output. That sounds basic, but it helps explain why some projects move smoothly while others stall, go over budget, or get stuck in revision cycles.
The input stage includes everything the studio receives before production starts. That usually means architectural drawings, CAD files, floor plans, elevations, material notes, mood boards, branding direction, reference images, and a clear explanation of what the visuals need to achieve. If the input is strong, the rest of the pipeline becomes easier to control. If the input is incomplete or inconsistent, problems tend to spread through every later stage.
The processing stage is where the actual work happens. This includes 3D modeling, scene setup, materials, texturing, lighting, cameras, rendering, and post-production. In a healthy workflow, each stage builds on the one before it. In a weak workflow, teams often move ahead before key decisions are settled. That creates rework later, which is one of the main reasons projects slow down.
The output stage is the final delivery: still renderings, animation frames, walkthrough visuals, or marketing-ready assets. But the quality of the output depends less on the final software step and more on how well the earlier stages were handled.
This is also where delays usually happen. Most delays in the 3d rendering pipeline do not come from the renderer itself. They come from missing files, vague feedback, design changes in the middle of production, or approval loops that reset already completed work. That is why experienced studios focus so much on process control. A team like Fortes Vision does not just produce visuals. It manages the workflow in a way that reduces friction, protects deadlines, and gives clients a clearer path from concept to final image.
Common Problems in the Rendering Workflow (And How to Avoid Them)
Even a solid concept can break down inside the rendering process if the workflow is not handled properly. Most production issues are not random. They tend to follow the same patterns, and they usually start earlier than clients expect. A professional architectural rendering workflow is built to catch these issues before they grow into major delays or weak visuals.
Unclear Brief → Endless Revisions
This is one of the most common problems in rendering projects. When the project goals are vague, the visual direction stays vague too. The team may not know which features matter most, what mood the client wants, which audience the images are for, or how realistic the final result should be. That usually leads to multiple rounds of correction that could have been avoided.
The fix is simple in theory but important in practice: define the brief properly from the start. That means collecting complete source files, references, visual priorities, and expected deliverables before production begins. A good studio will help shape that brief, not just receive it.
Low-Quality Models → Unrealistic Results
A weak 3D model almost always shows up in the final image. Poor proportions, missing details, inaccurate geometry, or rushed scene structure make the result feel off, even when the client cannot immediately explain why. People often assume realism comes mostly from materials or render settings. It does not. Realism starts with correct form.
This is why experienced teams spend time on technical accuracy early. In the architectural rendering workflow, a clean model is not optional. It is what allows lighting, camera work, and materials to perform properly later.
Poor Lighting → Flat Images
Lighting is one of the fastest ways to weaken a scene. The model may be correct and the materials may be well made, but if the light has no depth, direction, or balance, the image will still feel lifeless. Flat visuals are a common reason renderings fail to persuade buyers, investors, or stakeholders.
The solution is not just “more dramatic light”. It is the right light for the goal of the image. Good studios know when the scene needs clean daylight, when it needs warmth, when contrast helps, and when stylization starts to hurt credibility.
Unrealistic Expectations on Timing
Many clients underestimate how the rendering process actually works. They see the final image and assume most of the time is spent on the last render. In reality, much of the schedule depends on preparation, review rounds, changes in scope, and approval speed. If the team is asked to move fast while the brief keeps changing, quality usually suffers.
The best way to avoid this is honest scoping. A studio should explain what affects timing, where the risk points are, and what feedback structure will keep the project moving. That kind of transparency builds trust. It also helps clients understand the value of working with a team that has a disciplined workflow rather than just technical software skills.
How Long Each Step of the Rendering Process Takes
One of the most common client questions is simple: how long does the rendering process take? The honest answer is that timing depends on the scope, complexity, and decision speed of the project. Still, there are practical ranges that help set realistic expectations.
For many projects, the brief review and setup phase may take one to three business days, depending on how complete the input files are. 3D modeling can take several days or longer if the project includes custom architecture, detailed interiors, landscaping, or complex built environments. Materials, lighting, and camera setup often take another few days because this is where the scene starts moving from technical structure to presentation quality. Final rendering and post-production may be relatively fast on a small job, or much longer on a large photorealistic package with multiple views and high output requirements.
Here is the key point: timing is rarely controlled by one stage alone. It is controlled by the whole rendering process working together.
| Stage | Typical timeline |
|---|---|
| Brief review and file check | 1–3 business days |
| 3D modeling | 2–7+ business days |
| Materials, lighting, camera setup | 2–5 business days |
| Final rendering and post-production | 1–4+ business days |
These are not promises. They are working ranges based on normal production logic. A simple room scene can move faster. A large commercial development, a hospital walkthrough, or a premium residential marketing package can take more time. Revision rounds also affect every schedule.
That is why serious clients should not ask only, “How fast can you do it?” A better question is, “How do you manage the process so the timeline stays realistic and the quality stays high?” That is where experienced teams stand out. And if the reader wants a deeper timing breakdown, this is a natural place to continue to How Long Do 3D Rendering Services Take. Fortes Vision helps clients understand timing early, scope projects properly, and avoid the kind of delays that usually come from weak planning rather than actual rendering time.
What Affects the Quality of Final Renderings
A lot of clients look at two images and ask the same question: why does one rendering feel premium and believable while the other looks artificial, even when both show the same kind of space? The answer usually comes down to the quality of the visualization workflow, not just the software being used.
Lighting is one of the biggest factors. Good lighting creates depth, mood, realism, and focus. Bad lighting makes the image feel flat, overexposed, too dark, or visually confusing. Even a strong model can look weak if the light does not support the architecture. Materials matter just as much. Surfaces need to react to light in a believable way. If glass, concrete, wood, metal, or fabric behave incorrectly, the viewer may not know exactly what is wrong, but they will still feel that something is off.
Composition is another major factor. The camera angle, framing, and perspective shape how the viewer reads the image. A strong composition guides attention and helps the space feel intentional. A weak one makes the scene harder to understand and less persuasive. And then there is detail control. Good renderings include enough detail to feel real, but not so much that the image becomes noisy or distracting.
This is why high-end results rarely come from shortcuts. Quality does not come from one step alone. It comes from a controlled visualization workflow where modeling, materials, lighting, composition, and post-production all work together. And if a reader wants to better understand what makes an image feel truly realistic, this is the right place to continue to Photorealistic Rendering Explained. At Fortes Vision, this is exactly where the difference shows: not in flashy claims, but in how each visual decision supports realism, clarity, and the actual business goal behind the image.
Why Developers and Architects Rely on Structured Rendering Workflows
Developers and architects do not rely on a structured architectural rendering workflow because it sounds organized. They rely on it because it reduces risk. In real projects, visuals are tied to deadlines, approvals, presentations, investor conversations, marketing launches, and sales materials. If the workflow is weak, those business goals are harder to support.
A structured process helps teams stay aligned from the start. It creates a clearer path from project files to final deliverables. It reduces avoidable revisions, lowers the chance of visual miscommunication, and makes quality more consistent from one image to the next. That matters when a project includes multiple views, different stakeholders, or phased development.
It also helps teams make better decisions earlier. Instead of reacting to problems at the end, they solve them while the project is still manageable. That is one reason many firms continue investing in rendering as part of their planning and marketing workflow. And it is also why articles like Why Developers Use 3D House Rendering connect so naturally with this topic. The value is not just visual. It is operational and commercial. Fortes Vision supports that process by giving clients a workflow they can actually rely on, not just a final image delivered at the end.
When You Should Use Professional Rendering Services
Not every project needs outside help. But there are clear cases where professional rendering services make more sense than trying to manage the full rendering process in-house.
If the visuals are meant for marketing, investor presentations, premium real estate listings, trade shows, pre-sales campaigns, or high-stakes client communication, quality matters too much to treat rendering as a side task. The same is true when the project is large, the timeline is tight, the architecture is complex, or internal teams do not have the time to manage a full production workflow properly. In those cases, the issue is not just software access. It is process control, visual judgment, and the ability to deliver work that supports the project’s actual goals.
This is where a specialized partner adds value. A good studio does not just create images. It helps define scope, identify weak points early, manage revisions, and produce visuals that are built for real use. Readers who are still comparing options may also want to review What Are 3D Rendering Services to understand where outside support becomes most useful. And for teams that want reliable execution, clear communication, and polished final output, Fortes Vision is built to handle exactly that through its professional rendering services.
Understanding the Rendering Workflow Helps You Control Results
The rendering process is not just a technical sequence. It is a way to control outcomes. When you understand how the architectural rendering workflow works, you stop guessing and start making informed decisions. You know what to prepare, what to expect, and where problems usually come from.
Most issues clients face are not about software. They come from weak inputs, unclear direction, or a broken visualization workflow. That leads to delays, extra revisions, and results that do not match expectations. On the other hand, when the 3d rendering pipeline is structured and managed properly, the process becomes predictable. Timelines are easier to maintain. Quality is easier to control. And the final visuals actually support the project, whether it is for marketing, sales, or investor communication.
This is where experience matters. A team that understands the full workflow does more than produce images. It guides the process, reduces risk, and helps you get results without unnecessary friction. That is the difference between just getting a rendering and getting visuals that work for your business.
If the goal is to get consistent, high-quality output without wasting time on corrections and rework, working with a professional team is the practical choice. Fortes Vision approaches every project with a clear, structured process, so clients are not left guessing at any stage. The result is simple: better visuals, fewer surprises, and a workflow you can rely on.
Your Journey | to Marketing Renders | That Bring Out | The Best in Your | Project
Read Our Whitepaper